- Open the configuration file in your favorite editor (mine is nano)
sudo nano /etc/network/interfaces
- Comment out the section where dhcp is being used (put the # in front of the line):
#auto eth1
#iface eth1 inet dhcp - Add a section like this example:
auto eth1
iface eth1 inet static
address 192.168.0.101
netmask 255.255.255.0
network 192.168.0.0
broadcast 192.168.0.255
gateway 192.168.0.1 - Close and save the file
- Reload the network service:
sudo /etc/network restart
- Check to make sure you can access other computers/internet by using ping:
ping www.google.com
- If you don't get a response then you may have set your network information incorrectly. Just go back and repeat this process at step 3.
Wednesday, January 21, 2009
Create a Static IP from the Command Line
Creating a static IP from the command line is a very short task. All you need to edit is one configuration file and restart the networking service. You will need to know the settings for your network to do this. I will show how to set a static IP of 192.168.0.101 on a network with a gateway of 192.168.0.1.
Tuesday, January 20, 2009
Add extra storage on the fly with LVM2
Currently I am in the process of creating a file/print server for my home network. It's an older computer but I wanted to experiment with various set-ups and configurations. Two of my requirements were that I must be able to add extra storage on the fly and I must be able to see the two hard drives as one logical unit. The only way (at least that I know of) is to use LVM. I have used it in the past, but I never really needed so I usually did not pick it during the install. In fact my current Ubuntu desktop does not have LVM on it.
During my internet searches I came across this great article, A Beginners Guide to LVM. Read this all the way through and you should get a good grasp of the main commands of LVM. Since that article did not really explain how to what I wanted I had to adapt it to my needs. Here are the steps I used to get my 80GB Maxtor(sda) and 60GB Western Digital(sdb) to work together as one logical unit. I am also using ext3 as my filesystem because it supports on-line resizing.
During my internet searches I came across this great article, A Beginners Guide to LVM. Read this all the way through and you should get a good grasp of the main commands of LVM. Since that article did not really explain how to what I wanted I had to adapt it to my needs. Here are the steps I used to get my 80GB Maxtor(sda) and 60GB Western Digital(sdb) to work together as one logical unit. I am also using ext3 as my filesystem because it supports on-line resizing.
- Fresh install of Ubuntu Server 8.10
- Run updates:
sudo aptitude update && sudo aptitude safe-upgrade
- Reboot because of kernel upgrade
- Figure out what the extra hard drive is (mine is sdb):
sudo fdisk -l
- Partition the hard drive as Linux LVM:
sudo fdisk /dev/sdb
- Initialize partition for use by LVM (on my system sdb1 is swap):
sudo pvcreate /dev/sdb2
- Display attributes of volume groups to find your group name (mine is ubuntu-server):
sudo vgdisplay
- Add my physical volume to my volume group:
sudo vgextend ubuntu-server /dev/sdb2
- Now extend the logical volume root to include the new physical volume:
sudo lvextend -L128G /dev/ubuntu-server/root
- Lastly, resize the filesystem to include the new free space:
sudo resize2fs /dev/ubuntu-server/root
Thursday, January 15, 2009
Developing with NetBeans IDE
Programming is a hobby of mine and in recent days I have been testing out various IDEs (Integrated Development Environments). One such that I have really enjoyed using is the NetBeans IDE. One of the greatest features (at least in my opinion) is that no matter what OS I am using I can still be editing my programs with Netbeans. In my daily routines I will end up using Windows, Mac, and Linux so cross platform applications will always get a plus in my book. I also find that one of my greatest frustrations about programming is that most developers only create programs for a specific OS. Now, I understand why they do this (majority), but for people like me (minority) it is always a drawback to an application that only works in one OS. Enough ranting though lets get the latest NetBeans installed in your Ubuntu computer.
- Go to http://www.netbeans.org/downloads/index.html to download the version you want. Personally I chose the Java version but if you want Ruby, C++, or PHP you will want the All version. At the time of this writing the current version is 6.5 and my download was 208 MB.
- Wait for download to complete...
- Open a terminal and cd to the directory you saved it in. For me I saved it to my desktop so I typed in: cd Desktop/
- Now type: ./netbeans-6.5-ml-java-linux.sh (or whatever your version happens to be, use tab to autocomplete).
- If that doesn't work then it is possible that it needs the permission to execute. You could right-click>properties. Then under permissions check the box that says "Allow executing file as program" or you could type into command line: chmod +x ./
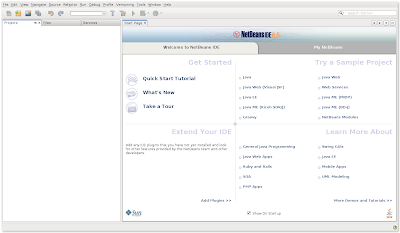
- You should see a screen much like the one above. Just follow the prompts and you will have NetBeans installed in no time.


Subscribe to:
Posts (Atom)